How It Works
The conductor's baton for
your live show with Reaper
From setup to the last note - total control, every night.
One-time Setup
Tuning in
Before the first downbeat, Reaper and ReaPilot need to get in tune. A one-time setup — one file, one control surface — and they'll stay in sync, show after show.
Refer to the manual included with the application - everything is explained there with great clarity.
Prepare Your Project
Regions become Clips
ReaPilot translates your Reaper project structure into an easily manageable playlist. Every Region on the Reaper timeline becomes a Clip in the ReaPilot playlist.
For ReaPilot to correctly interpret your show, the Reaper project needs to follow a few simple rules. Follow this checklist while preparing your project:
- Define regions for each song, cue, or segment of your show.
- Name each region clearly - the name will appear as the Clip name in the playlist.
- Make sure regions don't overlap.
- Disable Transport: Toggle stop playback at end of loop if repeat is disabled in Reaper's action list (state must be OFF).
Build Your Setlist
Here is your Playlist
Once the project is ready in Reaper, press Q and ReaPilot will read the open project and create a Playlist with all your Regions - now called Clips.
Each row in the playlist is a Clip, displaying essential information at a glance. You can save and load different Playlists for different shows, all using the same Reaper project.
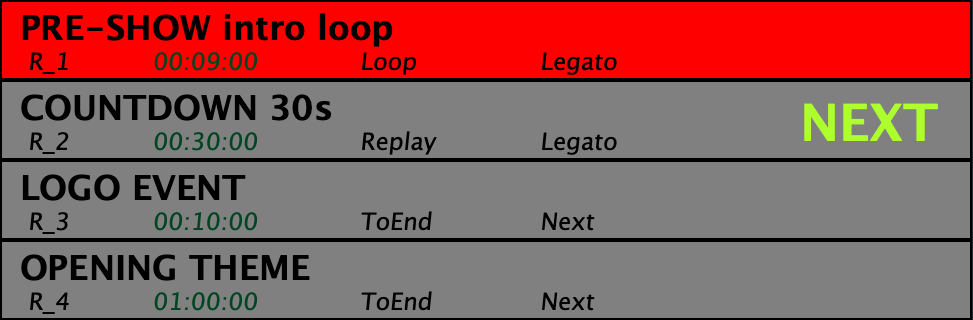
The playlist is your control center for the entire show. You can reorder Clips, customize each one's behavior, and quickly navigate through your setlist - even mid-performance.
You can have different Shows, with different Playlists, all using the same Reaper project.
The Conductor's Podium
Take the Stage
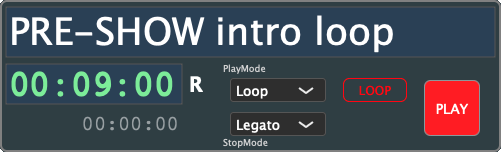
The Player is your real-time conductor's podium. It displays the currently loaded Clip and gives you immediate access to transport functions - letting you lead your live performance like a true maestro.
From the Player you can play, pause, stop, and rewind the current Clip, switch to the next Clip, or toggle loop mode - all from the keyboard or a MIDI controller.
The Player always shows you where you are and what's coming next, so you never lose your place during the show.
Playout Strategies
Every Clip, its own personality
Every Clip can have a customized behavior for when it starts and when it finishes. Combine them to create the perfect dynamic for your show.
How does a Clip start? - PlayMode
The PlayMode defines how a Clip behaves when you hit the Spacebar.
ToEnd (Default)
Classic Play / Pause. The spacebar starts and pauses playback.
Ideal for: linear sequences, musical tracks.
Loop
Plays the Clip in a continuous loop. Press L to exit and proceed to the NEXT Clip.
Ideal for: waiting sections, intros, backgrounds.
Replay
Functions as a retrigger - pressing Spacebar always restarts the Clip from the beginning.
Ideal for: sound effects, jingles, cues.
What happens at the end? - StopMode
The StopMode determines the transition between Clips, allowing you to create automatic sequences or maintain manual control.
Next (Default)
At the end of the Clip, the player stops and loads the NEXT one, waiting for the Play command.
Ideal for: standard setlists where you want manual control between songs.
Legato
At the end of the Clip, it immediately loads and starts the NEXT one without interruption.
Ideal for: medleys, continuous sequences, walk-in/out music.
Flexibility
Change the setlist on the fly
A live show is unpredictable. ReaPilot gives you the tools to rearrange the setlist in real time without ever losing control.
The NEXT indicator in the playlist always shows which Clip will be loaded automatically after the current one ends. At any moment - even while a Clip is playing - you can redirect the flow and choose a different NEXT Clip, without breaking the audio.
The setlist isn't set in stone. You decide at the last second which song plays next - without breaking the flow or touching Reaper.
You can also navigate directly to any Clip in the player using the arrow keys, independently from the NEXT selection logic.
MIDI Control
Cut the strings
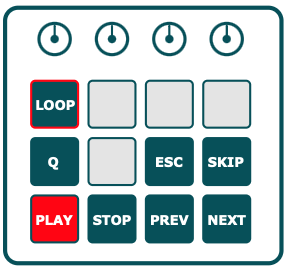
Manage the most important show functions directly from your MIDI controller - without touching the computer keyboard. Use a MIDI footswitch if you need your hands completely free.
ReaPilot lets you map any function to any MIDI controller button, fader, or pedal. The mapping is global - set it once and it works across all your shows.
From Preferences › MIDI Settings you can assign your MIDI device and map each function using a simple learn process.
Once configured, your controller becomes a seamless extension of ReaPilot - and your workflow on stage is clean, fast, and reliable.